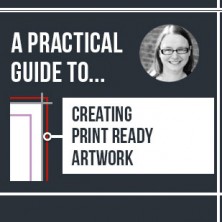
A practical guide to creating print ready artwork
15th February, 2016
Whether you are creating a brochure, a business card or even a single sided flyer, designing a print document is never as simple as just slapping your logo and contact details onto a design and sending it to print.
Even though each job has slightly different specifications there are a few fundamental steps that you must follow when setting up and exporting print ready artwork to ensure it is printed correctly.
Throughout this blog series we plan to answer the following questions:
- Which design software program/s should I use?
- How do I create a print ready document?
- What colour mode should I use?
- Have I added images correctly?
- Did I use my fonts legally?
- How do I export my design in the right file format?
- What print marks should I use?
- Which print vendor will print the job?
Having a better handle on these basic requirements will save you and your design agency a lot of time, and help you avoid technical difficulties when it comes to printing the final document.
This week we’ll begin with question one:
Which design software program/s should I use?’
Starting a print project involves knowing the requirements and understanding the scope of the project. The content will dictate which software you use.
Ask yourself a few questions to help establish which software best lends itself to your project:
Is the design made up exclusively of photographic images?
Does it include stylised text?
Are you designing a multipage brochure with columns of text and a variety of images?
Here is a helpful summary of three of the Adobe Creative Suite programs to help you choose which program best suites your needs:
- If your print project involves a combination of photos, vector graphics, headings and columns of text, then you should ideally use Adobe InDesign CC. Adobe InDesign CC allows users to control multiple layout and text styles throughout the whole document with a few simple clicks, which aids consistency and productivity.
- If you’re making illustrations or designing a simple text-based layout, you can work exclusively in Adobe Illustrator CC. In Adobe Illustrator CC you can create multiple artboards within a single file. Keeping several designs together in one file makes them easier to update and ensures consistent colour palettes.
- If you’re retouching photos or designing a series of photo-realistic images on a single page with no text content, you can use Adobe Photoshop CC.

During this series of blog posts we will be focusing on how you can use these three Adobe programs to create print ready artwork, from the initial set up right through to exporting and sending the document to print.
It’s worth noting that as well as the Adobe programs; CorelDRAW Graphics Suite or QuarkXPress can also be used to create documents for print.
If you are currently using CorelDRAW Graphics Suite or QuarkXPress and have any questions feel free to give us a ring on 01273 702525 and we’ll be happy to help.
In the next edition of ‘A practical guide to creating print ready artwork’ we will explain how to set up a print ready document, so you can start designing with confidence, knowing it’s set up correctly.


Comments
comments powered by Disqus